The Travelling Hexagon
In June of last year I finished my 2D Golf game. 14 months later and I’ve done three game jams and made two more bigger games. This game is the most complex game I’ve created in Godot so far. Whilst it’s not very pretty, I made sure to make it look as clean as possible to communicate to the player in a simple way.
The purpose for this game was to increase the scope of game I could handle, try more new things out, and release it onto something public.
The Idea
The roots of the ideas of these games comes from playing games like Starseed Pilgrim, The Witness, along with hexagonal grids. I liked the idea of a hexagonal grid where tiles would have different behaviours and each tile interacted with every other tile in interesting ways.
My main problems in working out how the game would play was:
- What is the goal to complete a level?
- What are the rules for how tiles interact?
- What does each tile do?
I decided that filling the whole grid was the most straightforward goal to explain rather than drawing specific paths of hexagons or some other goal.
Figuring out how the different tiles interacted, I decided to make a global hierarchy where higher level tiles beat lower level tiles, with a few special exceptions.
Figuring out what each tile would do was more about thinking about interesting behaviour I could implement, then deciding how to represent that.
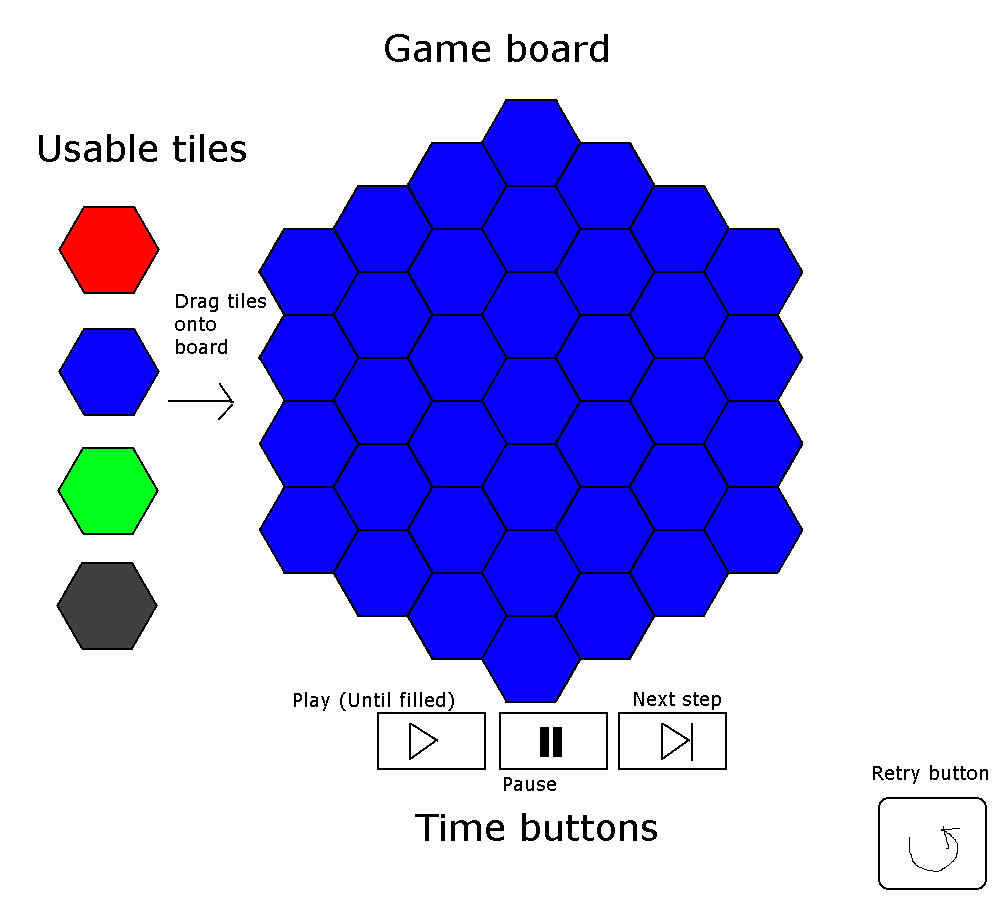
Here’s a mockup I made right at the start of development:

Development
The development process was somewhat ordered, and somewhat chaotic. I think overall there was a rough plan that looked like:
- Get the basics of the game working such as the hexagon grid, basic interactions and so on
- Add new tiles and levels
- Polish the look and feel of the game
- Repeat steps 2 and 3 until done
I aimed for 60 levels of increasing complexity. I built a level editor pretty early on so I could speed up the level design process. Every time I added a new tile, I just fit it into the hierarchy of the game and it would be available in the level editor. Some tiles are a bit special and required more work like the Lock/Key and the Clone tile, but others were a lot easier.
New stuff I tried out in development
Vector Art
About midway through development I realized that pixel art for this game could be changed into vector art and it would result in cleaner looking lines. So I learned the basics of my first vector art program, Inkscape and using my existing pixel art as a start, made vector art versions of my tiles.
Art comparison:
![]()
Music
I learned the basics of LMMS and used free VSTs and Soundfonts. Composing music is really fun but I found it really hard to make anything that I thought was any good. I decided to leave it at around 30 seconds of music that I was kind of happy with, but I’ll need a lot more practice to make a larger soundtrack.
More options for SFX
Another upside of learning LMMS was that I could enhance my SFX production options. In Larrikin Quest, I used only bfxr, but LMMS has bfxr + heaps of other options since its an entire digital audio workstation. I also used a few downloaded SFX from here.
Level editor
In my Sokoban clone I created a really simple level editor, so whilst this isn’t the first time I’ve ever made one, this is the only one I’ve made where the game was actually finished at the end.
Lessons learned
- Feedback is really useful, so next game I want to get people involved as early as possible.
Thank you for reading and I hope you enjoyed the game. If you haven’t played it yet, you can down here: